Post Management
Create, schedule, and manage social media posts across all your connected platforms
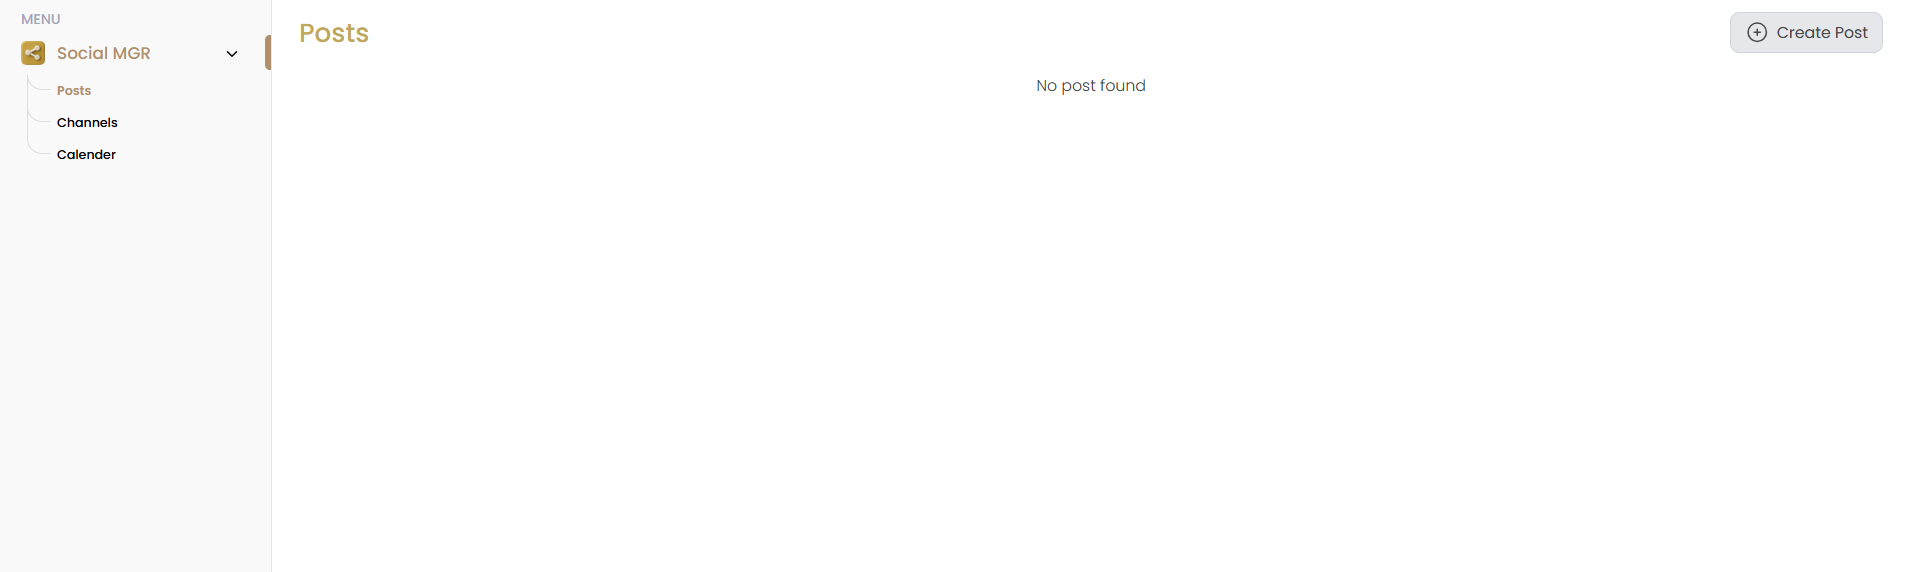
Posts Overview
The Posts section is where you can create, manage, and monitor all your social media content. From here, you can see your published, pending, and scheduled posts, create new content, and track performance metrics.
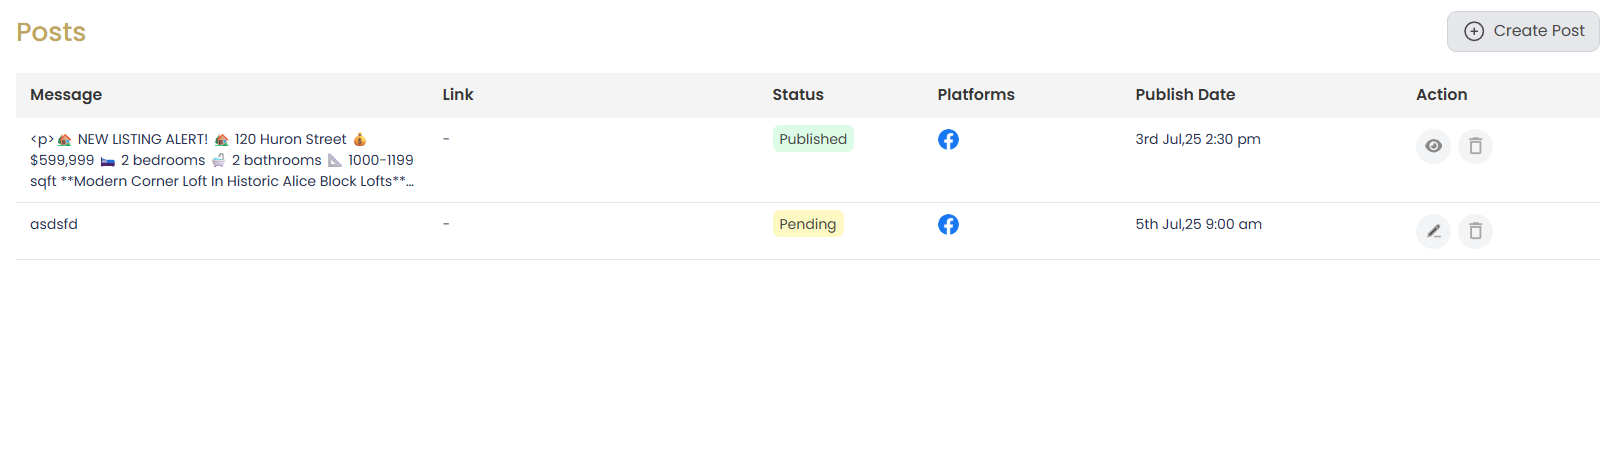
Posts Dashboard Elements
- Create Post Button: Located in the top right, this button starts the post creation process
- Posts Table: Lists all your posts with their message, status, publishing platforms, and date
- Status Indicator: Shows whether a post is Published, Pending, or Failed
- Action Buttons: Each post has view, edit, and delete options
- Platform Icons: Shows which social platforms the post was published to
Creating a New Post

Step-by-Step Instructions
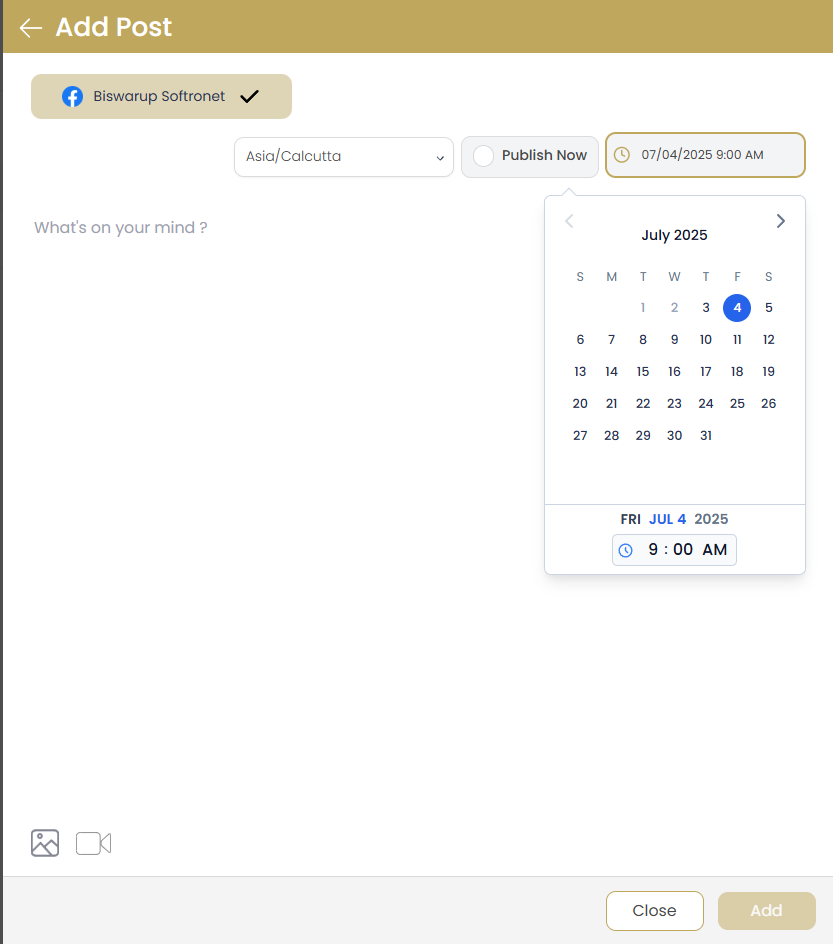
Start Post Creation
Click the button in the top-right corner of the Posts page.
Select Target Platforms
Choose which connected social media platforms you want to publish to by clicking on their icons.
Compose Your Post
Write your post content in the text editor. You can format text, add emojis, and include hashtags as needed.
Add Media (Optional)
Click the image or video icon to upload media to your post. You can add multiple images for platforms that support it.
Choose Publishing Time
Select "Publish Now" to post immediately or set a specific date and time for scheduled publishing.
Finalize and Publish
Click to schedule or publish your post. It will then appear in your Posts dashboard with the appropriate status.
Post Creation Tips
- Character Limits: The system will warn you if your content exceeds platform-specific character limits
- Hashtags: Add relevant hashtags to increase post visibility, especially for Instagram
- Best Times: Consider scheduling posts during peak engagement hours for your audience
- Preview: Use the preview function to see how your post will appear on each platform
- Image Sizes: For best results, use images with at least 1200 x 630 pixels resolution
Scheduling Posts
Scheduling posts allows you to plan your social media content in advance and ensure consistent posting even when you're busy with other tasks.
How to Schedule a Post
Follow the steps to create a new post
Instead of "Publish Now," select the calendar icon
Choose your desired publication date from the calendar
Set the specific time for publication
Click "Add" to schedule your post
Scheduling Information
- Posts can be scheduled up to 6 months in advance
- All scheduled posts appear in your Content Calendar for easy visualization
- You can edit or cancel scheduled posts any time before publication
- The system uses your account's timezone settings for scheduling
Editing and Managing Posts
Editing a Scheduled Post
Find the post you want to edit in your Posts dashboard
Click the edit (pencil) icon next to the post
Make your desired changes to the content, media, or schedule
Click "Save Changes" to update the post
Important Note
Published posts cannot be edited on most platforms. If you need to change a published post, it's recommended to delete it and create a new one.
Deleting Posts
Find the post you want to delete in your Posts dashboard
Click the delete (trash) icon next to the post
Confirm deletion when prompted
For scheduled posts, this will cancel the scheduled publication. For published posts, this will remove the post from your dashboard but may not remove it from the social platform (depending on platform policies).
Monitoring Post Performance
Track the success of your social media posts by monitoring engagement metrics and performance indicators.
Viewing Post Analytics
In your Posts dashboard, find the post you want to analyze
Click the view (eye) icon to open the post details
Navigate to the "Analytics" tab to see performance metrics
Available Metrics
- Reach: The number of unique users who saw your post
- Impressions: Total number of times your post was displayed
- Engagement: Combined likes, comments, shares, and clicks
- Engagement Rate: Percentage of viewers who engaged with your post
- Clicks: Number of clicks on links in your post
- Shares/Retweets: How many times your post was shared
- Comments: Number of comments received
- Likes: Number of likes or reactions received
Analytics Insights
Use these metrics to understand what content resonates with your audience. Look for patterns in your most successful posts to guide your future content strategy.
Real Estate Post Templates
Social Manager includes specialized templates designed specifically for real estate professionals, making it easy to create engaging property-related content.
Using Real Estate Templates
When creating a new post, click the "Templates" button
Choose from categories like "Listing Announcement," "Open House," or "Market Update"
Select your preferred template
Customize the template with your specific property details and images
Schedule or publish as normal

Popular Real Estate Templates
- New Listing Announcement: Showcase newly listed properties with key details
- Just Sold: Highlight your recent sales success
- Open House: Promote upcoming open house events
- Price Reduction: Announce price changes on existing listings
- Market Update: Share local real estate market statistics and trends
- Client Testimonial: Feature positive feedback from satisfied clients
Troubleshooting
My scheduled post failed to publish
Solution: Check if your social media connection is still active. Failed posts are usually caused by expired connections, content policy violations, or temporary API issues. Click the retry icon next to the post to attempt republishing.
Images aren't uploading properly
Solution: Ensure images are under 10MB and in supported formats (JPG, PNG, GIF). Check your internet connection and try uploading one image at a time. Large files may need to be compressed before uploading.
Post appears differently on different platforms
Solution: Each platform has different character limits and formatting rules. Use the "Customize per platform" feature to optimize content for each social media platform's specific requirements.