Expense Management
Comprehensive guide to tracking and managing business expenses in Agent Teammate CRM
Overview
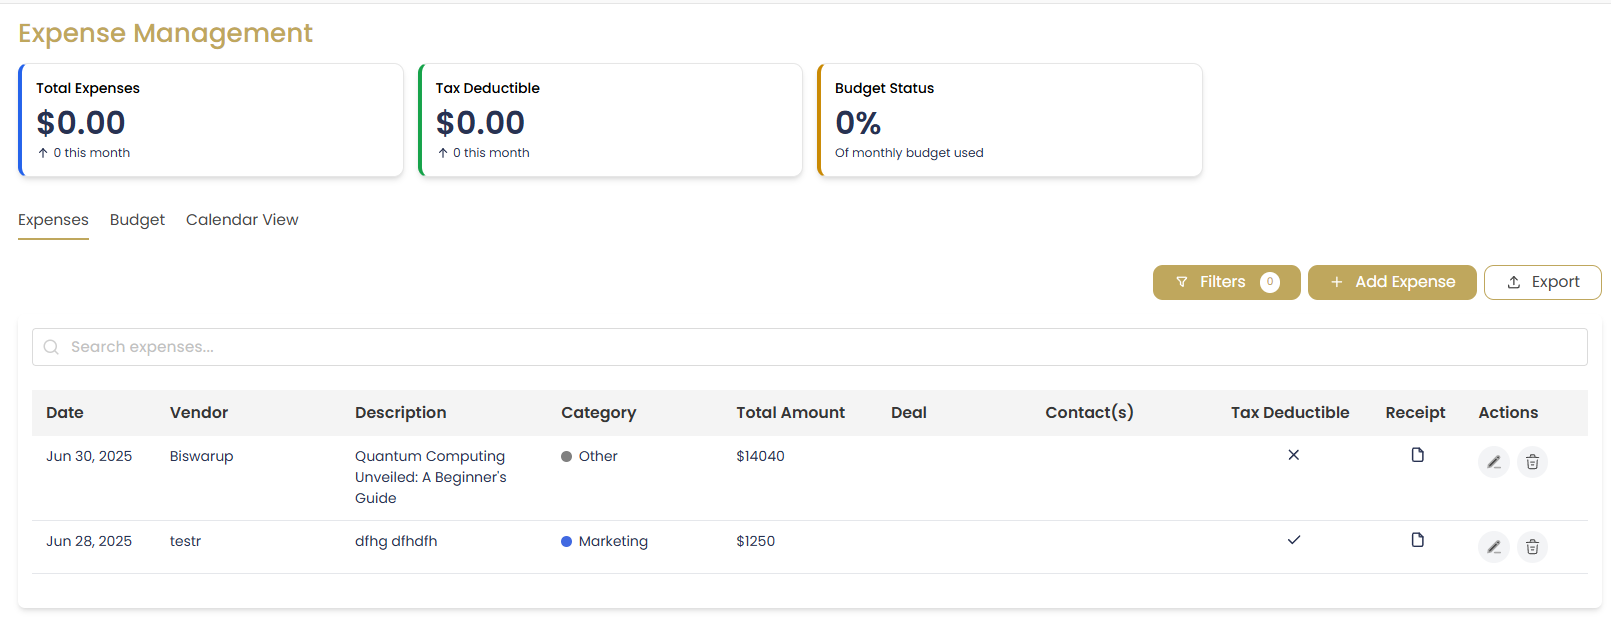
The Expense Management module in Agent Teammate CRM helps real estate professionals track and manage business expenses efficiently. Keep detailed records of all business-related costs for tax purposes and financial analysis.
Key Features
Expense Tracking
- Expense Tracking: Record all business expenses with detailed information
- Receipt Management: Attach digital receipts and documents
- Category Management: Organize expenses by categories (travel, marketing, office supplies, etc.)
- Client Assignment: Associate expenses with specific clients or deals
- Tax Tracking: Track tax-deductible expenses for tax reporting
- Expense Reports: Generate detailed expense reports for accounting
- Approval Workflow: Submit expenses for approval if required
- Reimbursement Tracking: Track reimbursement status
Adding Expenses
Step-by-Step Process
Access Expense Module
Navigate to the main menu and click on "Expenses" or "Financial" section, then click the "Add New Expense" button.
Enter Expense Details
Select the expense date, choose the expense category, enter the amount, and add a description of the expense.
Associate with Client/Deal
Search for and select the related client, choose the associated deal if applicable, and mark as billable to client if appropriate.
Attach Documentation
Click "Attach Receipt" to upload receipt images or PDF files, and add any additional notes or comments.
Submit Expense
Review all entered information, mark as tax-deductible if applicable, and click "Save" or "Submit for Approval".
Managing Expenses
Viewing Expenses
- View all expenses in a searchable list
- Filter by date range, category, or client
- Sort by amount, date, or approval status
- Use quick filters for pending, approved, or reimbursed expenses
Editing Expenses
- Click on any expense to edit details
- Update amounts, categories, or descriptions
- Add or replace receipt attachments
- Change client or deal associations
Bulk Operations
- Select multiple expenses for bulk actions
- Submit multiple expenses for approval
- Export selected expenses to CSV or PDF
- Delete multiple expenses at once
Expense Categories
Default Categories
- Marketing & Advertising: Signs, flyers, online ads
- Travel & Transportation: Mileage, gas, flights
- Client Entertainment: Meals, entertainment expenses
- Office Supplies: Stationery, equipment, software
- Professional Services: Legal, accounting, consulting
- Education & Training: Courses, conferences, certifications
- Communication: Phone bills, internet, postage
- Insurance: Professional liability, E&O insurance
Custom Categories
You can create custom expense categories to match your specific business needs. Go to Settings > Expense Categories to add, edit, or remove categories.
Expense Reports
Available Reports
- Monthly Expense Summary: Total expenses by month
- Category Breakdown: Expenses grouped by category
- Client Expense Report: Expenses associated with specific clients
- Tax Deductible Expenses: All tax-deductible expenses for tax filing
- Reimbursement Report: Track pending and processed reimbursements
Generating Reports
Access Reports
Go to Expenses > Reports and select the report type.
Configure Parameters
Choose date range and filters, then click "Generate Report".
Export Report
Export to PDF, Excel, or print the generated report.
Best Practices
Record Keeping Tips
- Enter expenses immediately to avoid forgetting details
- Always attach receipts for expenses over $25
- Use clear, descriptive names for expense descriptions
- Categorize expenses consistently
- Review and approve expenses regularly
Tax Compliance
- Keep digital copies of all receipts
- Mark business expenses appropriately
- Separate personal and business expenses
- Consult with your accountant about deductible expenses
- Generate tax reports at year-end
Troubleshooting
Common Issues
Q: I can't upload a receipt image
A: Check that the file size is under 10MB and in a supported format (JPG, PNG, PDF). Clear your browser cache and try again.
Q: My expenses aren't showing in reports
A: Verify that the expenses are within the selected date range and that any filters are set correctly. Check that expenses have been approved if required.
Q: How do I correct a submitted expense?
A: If the expense hasn't been approved yet, you can edit it directly. For approved expenses, you may need to create a correction entry or contact your administrator.